The SCREEN$ Paintbox Fill Style Selector
The Fill Style Selector can be found in the SCREEN$ Paintbox.

The Fill Style Selector is very similar to the interface which is present in the Pen Creator Window, for Graphical pens. As you can seem the list of fill styles is almost identical:
As with the Pen Creator, the amount of graphics available depends on what you have recently been doing - you may have graphics open in the Graphic/Sprite Editor, and may have a selection set in the paintbox. These, as with the pens, are all available to you.
However, simple tiled fills are not all that BasinC can do - use the drop-down menu at the top of the window to choose a Gradient Fill, if you like.
Gradient Fills
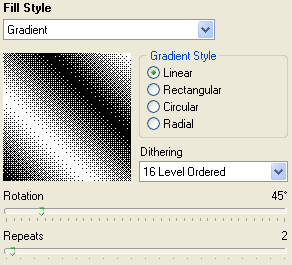
From here you can elect to fill your shapes and floodfills with a gradient instead of a pattern. As can be seen from the image above, the Spectrum is unable to handle smooth graduations of one colour to the next, and so needs to "dither" the image to create the impression of more colours than there actually are. On a PC monitor this results in a grainy image, but on the Television sets that the Spectrum was intended to be used on, the graininess was much less visible.
To the right of the preview, you can select the type of gradient you want, from one of these four styles:
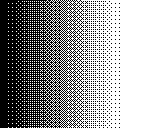
The Linear gradient runs from PAPER through to INK, left to right and is the most simple type of gradient available.
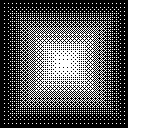
The Rectangular gradient runs from the outside of the shape, from the PAPER colour through to the INK colour in the centre. This produces a "Pyramid-like" effect, but can produce visible "arms" diagonally across the fill region.
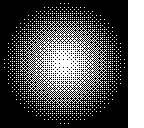
Like the Rectangular gradient, this fills from the outside-in from PAPER to INK in the centre. There are no artifacts such as the "arms" visible diagonally in the rectangular gradient, but there are, due to the circular nature of the fill, large blank regions of PAPER in the corners.
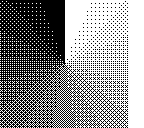
The radial gradient utilises a "sweep" motion to complete it's task, moving through 360 degrees completely filling the space available. It starts with PAPER and gradually moves through to the INK colour, when the sweep is complete.
Below the gradient option, is the dithering option. This is a list of dithering styles from simple random-dot and ordered dithers through to sophisticated error-diffusion dithering algorithms. You should choose the one that works best for your image. Bear in mind that some error diffusion algorithms produce artifacts around 50% grey levels (halfway through the gradient) and that some,such as Atkinson dithering, "Blow out" areas of high contrast which result in no dithering occurring.
Finally, there are the last two options - the rotation of the gradient dictates which direction the gradient will take. This can produce interesting effects for the rectangular dither, and is disabled for the circular dither as it has no meaning. The "Repeats" option repeats the gradient the specified number of times in a "ping-pong" motion. The image at the top of this page has two repeats, and the effect is visible there.